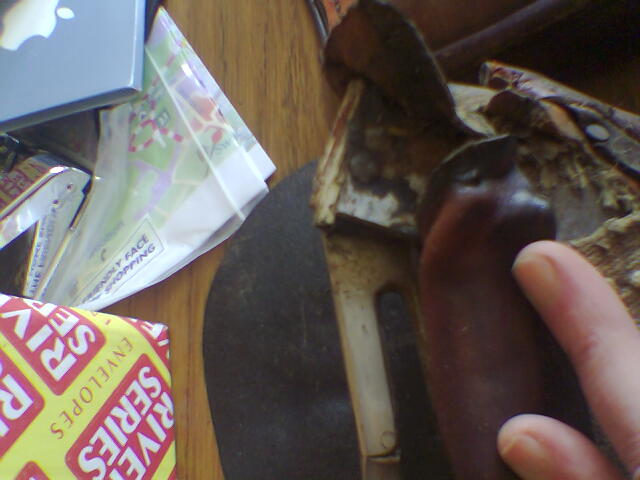
Removing the Panel From a Saddle
You are visitor number
The answers are simple. Most people's saddles are reasonably well cared for (on the parts that show and are easy to get to.)
Be honest. When you clean your saddle, how much attention do you actually pay to the stitching that joins the girth straps to their webs?
How hard do you try to clean, oil or soap that tight gap under the panel? (Did you even know there was a gap under the panel?)
How often do you really work at removing grit from around the stitches that hold the panel to the back of your saddle? (Did you even know that the panel was held on by stitches?)
When did you last try to work oil into the leather fixings of the dees?
None of these things are that simple while the panel is attached to the saddle. Yes, you CAN make oil seep between the panel and the base of the saddle (if you know that there's a gap there, and you really want to.) You CAN - but it's not easy.
A few words about oil.
Here's the real clincher, though. Without oil, your leather will become seriously ill-nourished, over time. It will dry. It will crack.
Even if the oil DID rot stitching, just bear in mind that stitching is easy and fairly cheap to replace. Kids can do it (honest, I've taught them to!) Thread is cheap and easy to buy. And the previous stitching holes will in most cases be usable.
Leather, on the other hand, is more difficult and much more expensive to replace. You have to have spare leather pieces to make patches - and you may not have them. Patched leather (unless it's done very expertly) ALWAYS looks 'patched'. And it won't have holes in the right places - you will have to space and punch the holes.
If you want the stitching to look neat, this either involves some delicate and accurate work with a ruler, or the purchase of a "pricking iron," which can be expensive. You'll also need to use a proper stitching awl to pierce the holes once you've marked them out, and although awl blades and handles aren't expensive, their use requires a certain knack, which you're not likely to acquire within the first few inches of stitching!
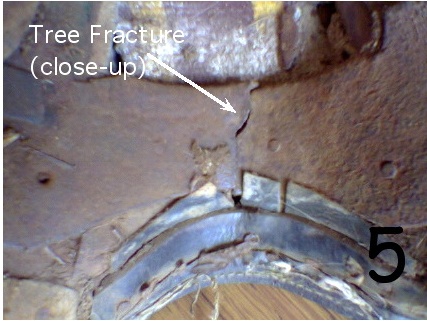
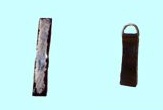
Broken Trees
Don't EVER use a saddle with a broken tree. You can cause such serious injury to your horse that he / she may never work again. Yes, people get away with it. Sometimes for ages. But the risk simply isn't worth it. (If it's an expensive saddle, it may be worth getting the tree repaired, if the break is in a position that's amenable to repair. Front arch and point breaks are the most suitable, as the arch is supported by steel, to which a fresh piece can be welded.)
Below are a few examples of common tree fractures.
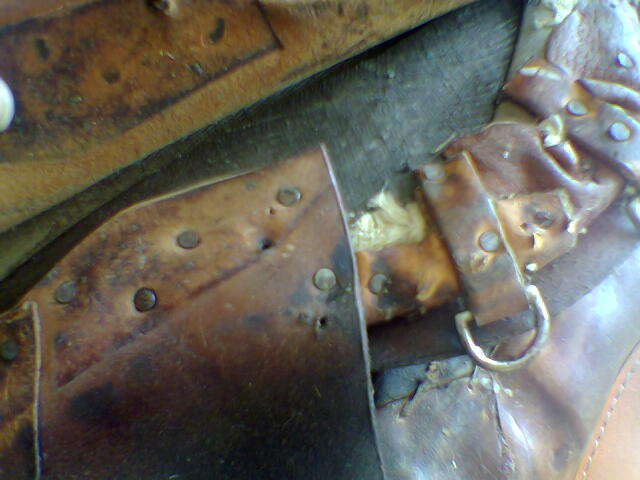
The only one that you can spot easily without removing the panel is the broken point. (First and third pictures.) On this particular saddle, the point on the other side had already broken at some stage and been welded (see picture 2.)
If your horse rolls / falls on his saddle and breaks one of the points, he will have weakened the other one, too. If it's worth getting one point welded, it's worth getting them both done at the same time!
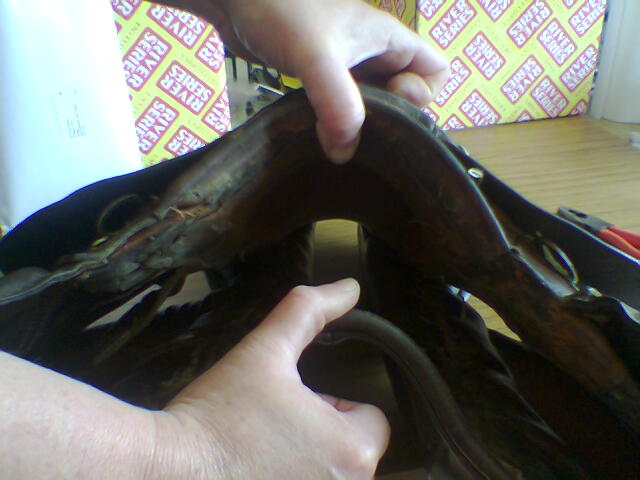
How to Remove the Panel
"Isn't it really hard and a specialist job to do this?" I hear you ask.
Well, actually, no it isn't. Removing a panel is child's play (given a relatively dextrous child!) and quite often the hardest part of stitching a panel back on can be threading the needle! Okay, some panels can be a bit 'piggy' to stitch back on - particularly if the leather is old and hard and unloved - but it's not half as difficult as you might think!
Before you even start, read right through the instructions, and keep this page open so you can refer to it as you go along. Take careful note of what's in the pictures, and make sure what you're doing matches what's in the pictures! Possibly the most important thing at this stage is to be absolutely sure that you've correctly identified which bit of stitching you're undoing; you don't want to be undoing the wrong bits and taking the panel seams to pieces by accident instead of detaching it from the underside of the saddle!
So here's how to start.
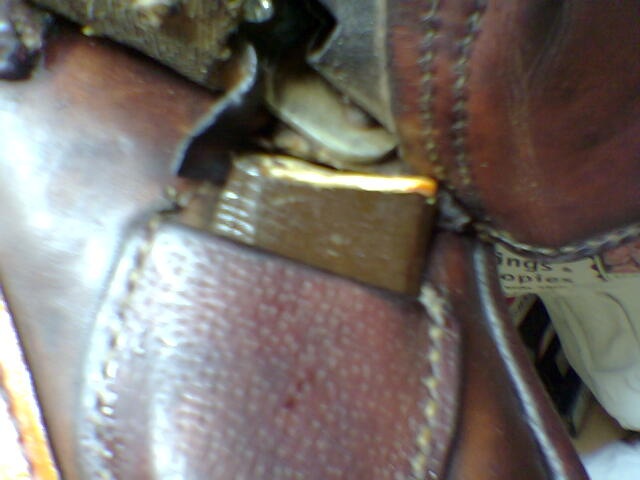
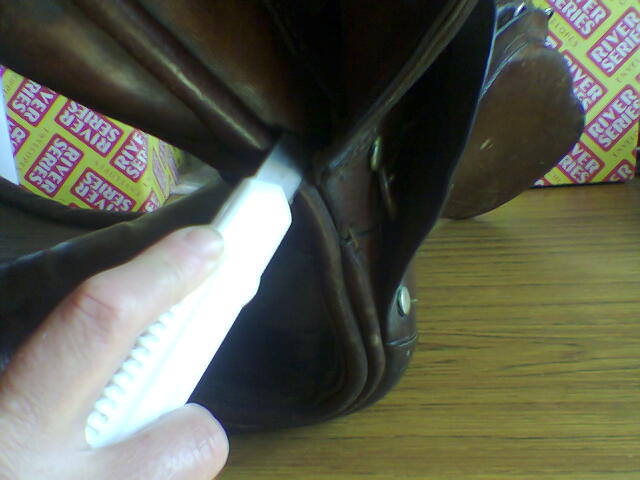
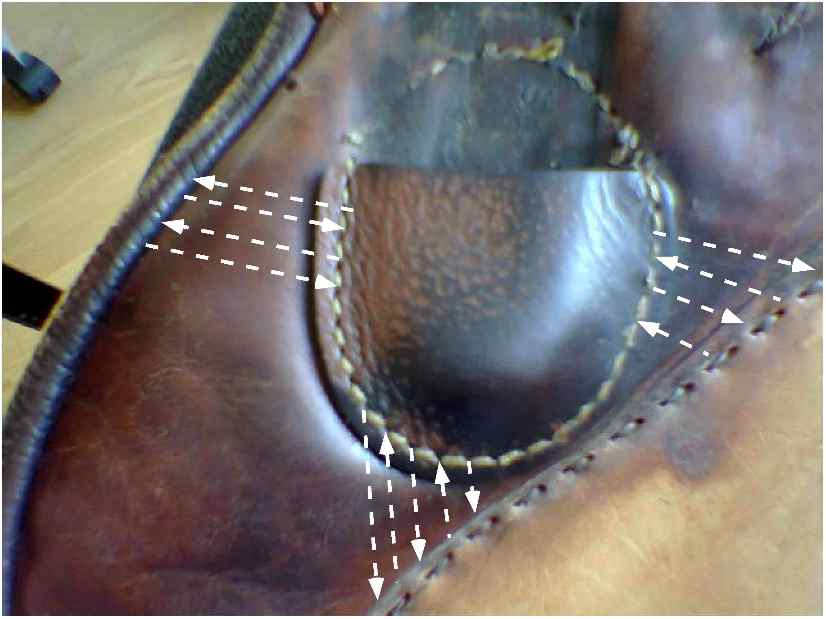
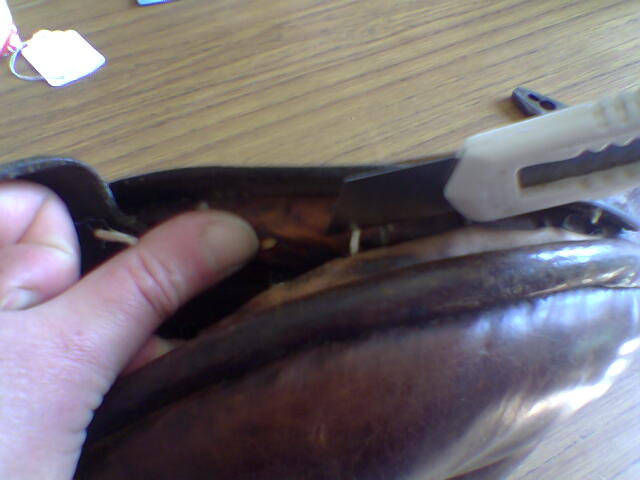
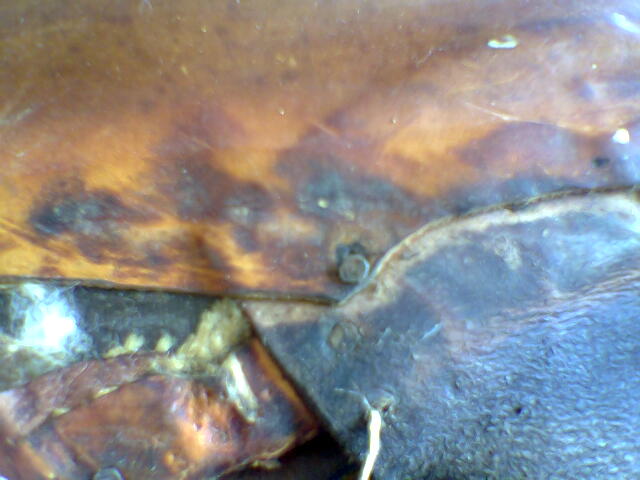
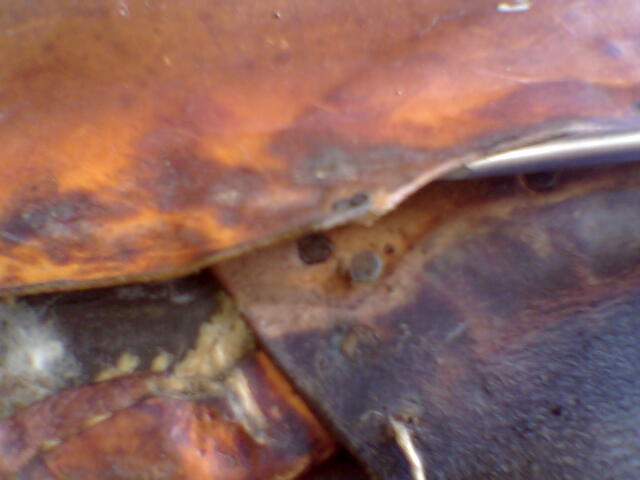
The panel is fixed to the front of your saddle using 'pop-stitch' (running stitch, for those of you who are more into needlework than saddlery!) You'll find the first and last stitches at about the level of the dees.
Before you start cutting through any threads, make sure that you've got the right ones! You're looking for thick thread, between the piping and the front arch of the saddle. Don't cut through anything that's sewn at many stitches to the inch, or you will be undoing the seams of the panel instead of detaching the panel from the saddle. Look carefully at the centre picture below to see clearly where to cut. (Imagine someone has sewn a soft toy to the leg of your jeans - to take it off, you undo the stitching holding it to the jeans, rather than taking the soft toy to pieces so the stuffing falls out of it, and leaving bits of furry fabric still sewn to your jeans!)
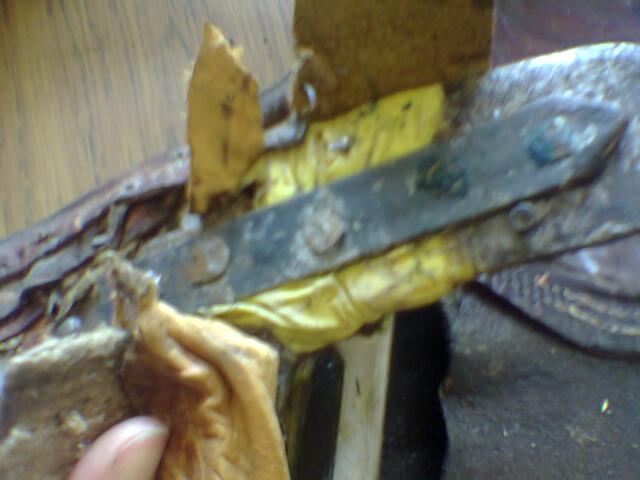
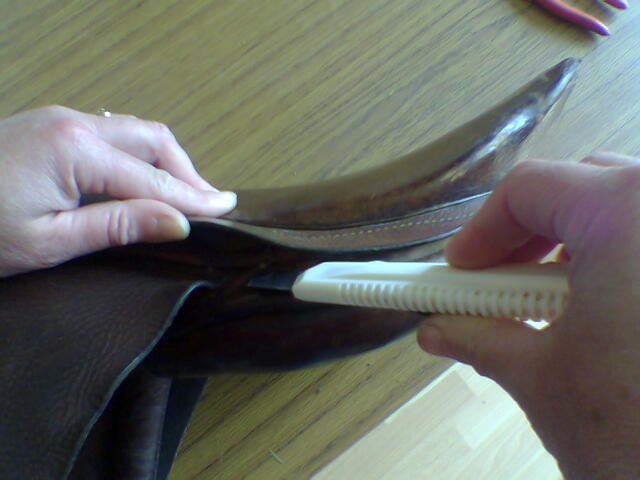
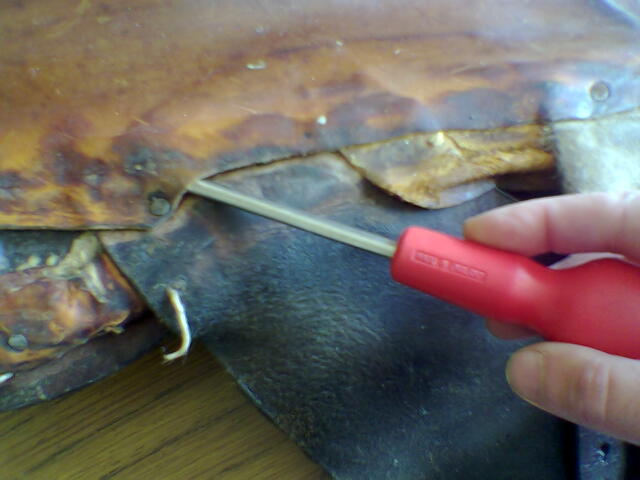
Using a sharp blade, simply slice through the stitches between the panel and the 'front'. (The front is a piece of leather, often with piping or a raised edge, which is held onto the underside of the pommel of your saddle by tacks.)
Ease the panel gently away from the saddle as you go. Leave the stitches in the holes for the time being - they'll help to stop the holes from closing up while you're working on the oiling and soaping. Don't remove them until you're just about to re-stitch.
Take this opportunity to check that the front is tacked securely onto your saddle tree. If any tacks are loose, remove them and replace with fresh tacks. Ordinary half-inch blue cut tacks are fine to use.
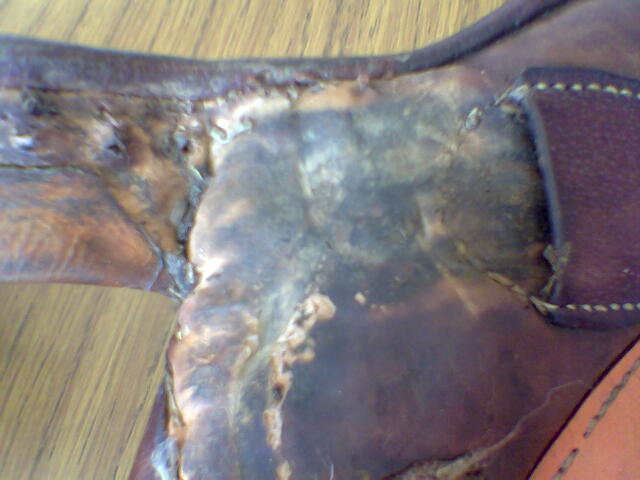
You might find that the points of the tree have become 'glued' into the point pockets by a mixture of grit, sweat, hair, hay and other unwanted gunk. This unofficial and very abrasive glue is what is responsible for almost all instances of point-pocket stitching wearing through. Drizzle oil down into the point pockets to lubricate them, and gently work the points out of the pockets. All that 'glue' will need to be removed.
CAUTION!
Be careful if you use your fingers to clean out the point pockets - you can get little splinters of hay under your fingernails (painful!) Proceed with caution. Using a teaspoon handle (gently! mind the stitches) is okay.
Having thoroughly cleaned out the point pockets, soak them with oil.
Check the stitching. If it's breaking, there's a knack to restitching. You don't have to unstuff the panel and start over, all you do is make long stitches inside the panel with the other ends coming out either next to the front piping or by the rear end of the knee roll section. As the leather the panel is made from is fairly soft and thin, you can pierce the stitching holes with a mini screwdriver.
You will need a longish needle, and either core-spun polyester thread or linen thread. (Wenzel linen thread can be bought on cards from many shops selling basic sewing equipment.) It's best to wax the thread - simply pull it through a lump of beeswax just before using it. You can get pure beeswax from many hardware shops.
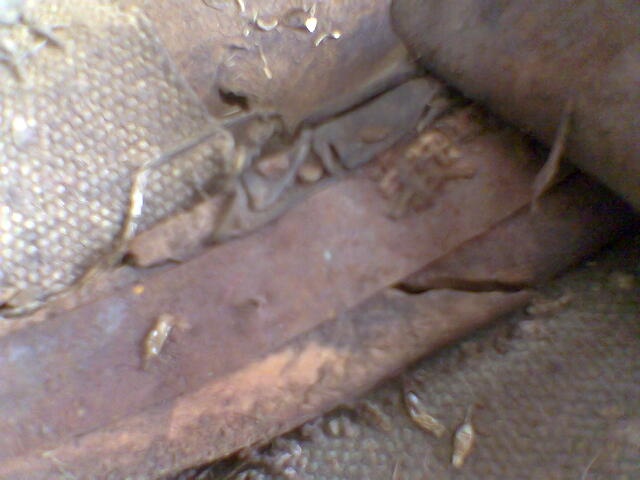
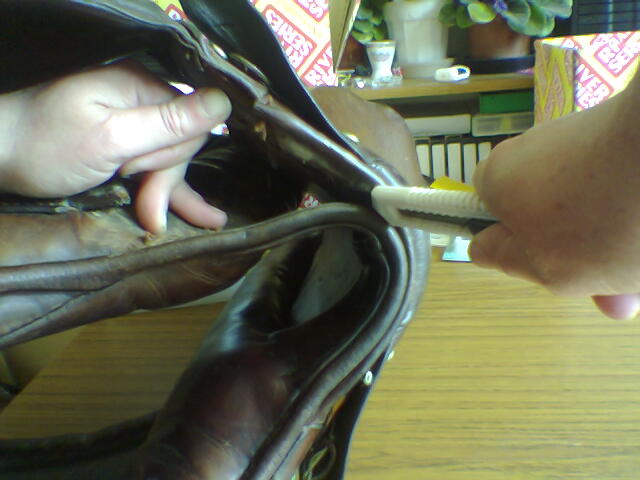
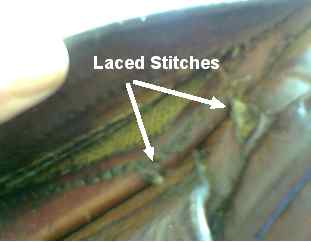
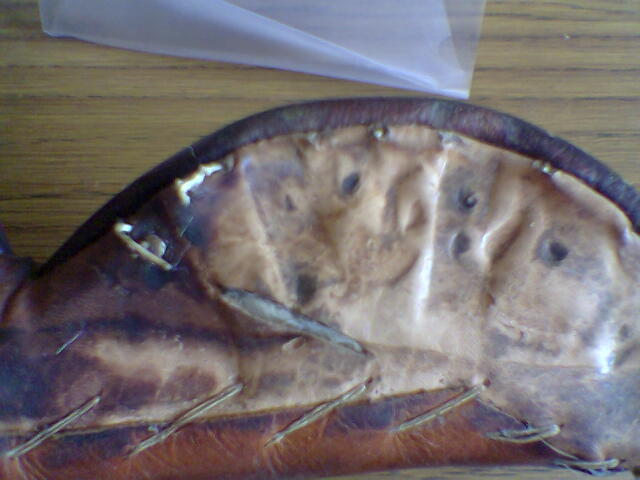
Removing the back of the panel is also a simple job. The back of the panel is "laced" on. (For needleworkers, this is the equivalent of ladder-stitch.) The stitches holding the back of the panel are quite widely spaced, a stitch of about an inch in the panel followed by one of about an inch in the saddle, etc.
The first and last stitches are usually roughly level with the back of the flap. You're looking for big long stitches, with fat thread, about an inch or so apart from each other, and not for the closely-spaced (eight or more to the inch) seam stitches in the panel itself. The correct stitches to remove are the ones above the piping (that's the rounded edge along the panel). Don't cut through anything below the piping. Look carefully at the picures below!
Again, use a sharp blade, slice through the stitches carefully one by one (careful not to cut the leather), easing the panel away from the saddle as you go. Again, leave the remnants of the stitches in the holes, to keep the holes open until you're ready to restitch.

A word of caution!
With the lining removed (and cleaned, oiled well and soaped both sides in preparation for replacing later), this is a good opportunity to give the tree a close inspection, brush out any dirt and unwanted lodgers from the inside of the saddle, thoroughly check (and replace if necessary) the stitching holding the girth straps to their webs, and (if necessary) add a couple of reinforcing tacks holding the webs to the tree. Anything that looks as if it's begging to be fixed, fix now. It could be a while before you take your saddle apart again.
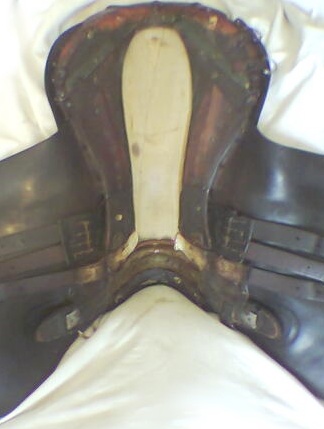
(Picture on right shows the inside of a saddle thoroughly cleaned, leather oiled and soaped etc, ready for reassembly.)
If the worst comes to the worst and you discover your saddle has a broken tree, salvage every scrap of usable leather off it. Leather pieces are always useful. Then throw what's left away - or give it to your local Pony Club to use for demonstrations of what a broken tree looks like.
Re-attaching the Panel
You will need:
- Half-inch blue cut tacks for replacing the lining on the base of the saddle
- Thread (I like Ritza braided polyester thread, 1 mm, as it slips easily through the existing holes, doesn't tangle itself up, and doesn't break easily, but several thicknesses of well-waxed linen thread would do as well.)
- A curved needle (a 3-inch needle is a good size); this doesn't have to be a specialist saddlery needle.
- Pair of pliers (for pulling the needle through the more awkward holes)
- Pair of tweezers (for removing old stitches from holes)
- Either a curved awl, or a strong bent plain skewer, for encouraging existing stitch-holes to open up for you where necessary
- A good supply of patience and / or cusswords if the panel turns out to be one of those 'piggy' ones!
First tack the lining back into place. Remove the old stitches from the front of the panel and from the front of the saddle. Liberally soap all the areas of the panel that are going to be in contact with the base of the saddle, including a generous helping of soap into the point pockets. Ease the points back into their pockets.
Cut off a good length of thread. There are few things more frustrating than nearly finishing stitching your panel back on and discovering you haven't left enough thread to work with. Give yourself around four foot of thread to tackle the front.
Knot a small loop into the loose end of your thread, locate the first stitch hole on the front of your saddle (you'll find a pair of holes, one each side of the join between the leather of the flap and the leather of the 'front', at about the level of the dees). Pass the needle up through the lower hole, back down through the second hole and through the loop at the other end of your thread. This is always the most secure way to start your stitching.
Now pass the needle down through the matching hole on the panel, back up through the first hole, and then pop-stitch your way up and down through all the holes, fixing the front of the panel to the front of your saddle. The best way to do this is to make all the stitches really loose, so that you can peer into the gap between panel and saddle to find the pre-existing holes. It's a matter of patience more than anything else.
Once you've stitched almost all the way along, you can then pull the stitches tight, one by one. Finish off by going round the last pair of holes a few times and then knotting the thread off neatly and cutting off the loose end. For added security, drip a drop of superglue onto the final knot.
For stitching the back of the panel back to the saddle, allow yourself six foot of thread. I know it sounds excessive, but it's much better to have too much thread than too little.
The pre-existing stitch holes are always easier to see on the back than they are on the front. They are not necessarily easier to work with! Old panels can have quite fragile leather where it has dried out, and you will need to bear this in mind.
The first stitch is roughly level with the back of the flap. Secure your first stitch, as before, by ensuring that your needle passes down through the loop you've knotted into the end of your thread. Again, make your stitches really loose - you need to have room to work. You'll have a long stitch through the seat leather, followed by a long stitch through the panel top, followed by another long stitch through the seat leather, all the way around the back of the saddle.
Take great care when pulling these stitches tight to finish off - always pull in line with the stitch, alongside the leather. If you pull outwards away through the leather, you can find the thread cutting through the leather like cheesewire!
Tip: when you're pulling up your stitches, push the panel up against the stitch line as hard as you can with your other hand. It will put less stress on the stitches and the leather. A drop of superglue on your final knot, as before, helps guard against it coming undone.
You're done!
(There, that wasn't so bad, was it?!)